Custom Harmonicas by Andrew Zajac
The most expressive harmonicas

Main navigation

  • Home
  • Custom Harmonicas
  • My Combs
  • Tool Kits and Accessories
  • Learning Products
  • Blog
  • Service
  • Dealers
  • About
  • Contact

Breadcrumb

  • Home
  • Blog posts

Blog posts

Sympathetic reed work™

By Andrew | 9:14 PM EST, Fri November 25, 2016

I call my new approach sympathetic reed work™ because it's important to unite all the forces that are acting upon the reeds.

_________________________________________

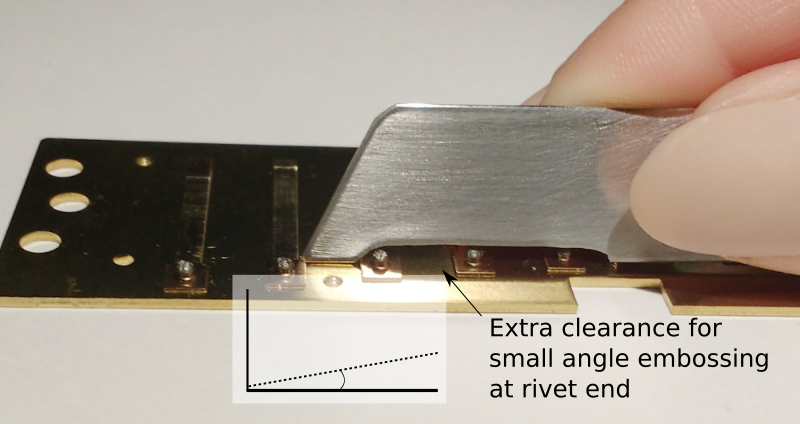
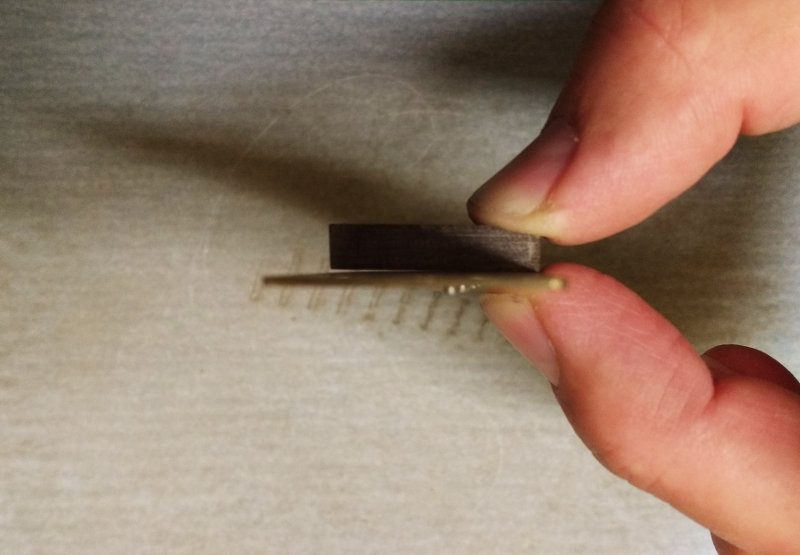
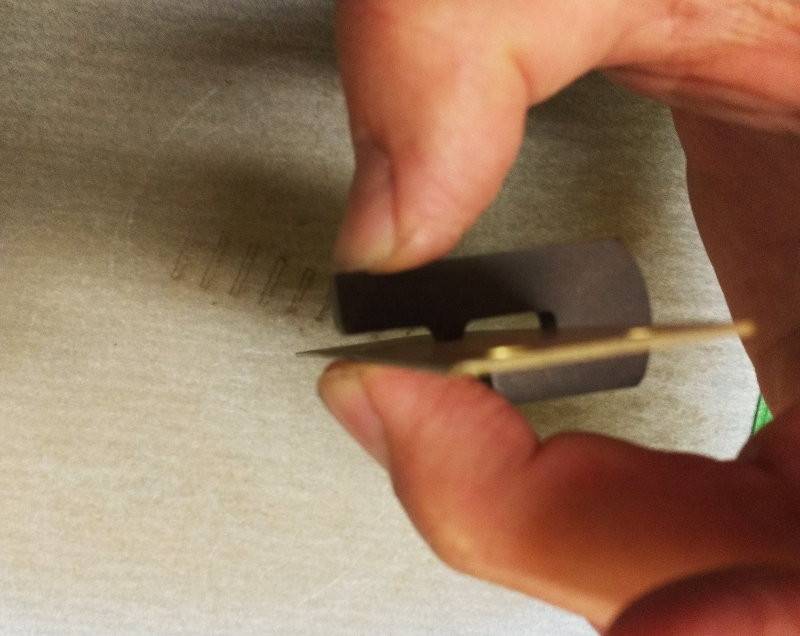
Reed work can be described as the strategic reshaping of a reed. I spent years developing my reed work so that reeds behave just the way I want.

The key is to work in small steps and to follow some simple rules: a theoretical model. With each small change, reevaluate the reed to confirm it behaves as expected and then make the next small change until the goal is reached.

Sometimes I observed interesting variances while following this process. I observed some quirky behaviors from some reeds every now and then. By the laws of the theoretical model I was following, what I was seeing should not work, yet there it was!

No biggie. Nothing to get excited about - my methodology was working just fine and I was getting the results I wanted. These extra results were interesting but they weren't getting in the way of getting the job done.

Just forge ahead and reach the goal! It's only that my theoretical model wasn't explaining every detail of what was going on. Forget about it and keep working in your comfort zone. There's work to be done! I said.

But after a while, I decided to chase down these variances. I wanted an explanation.

I expanded my theoretical model and explored whether the new version explained what I was seeing. I recreated those anomalous results and carefully observed what part of my model was right and what was wrong as I tweaked my approach to reed work. Each time I was wrong, it challenged my model and added to the picture.

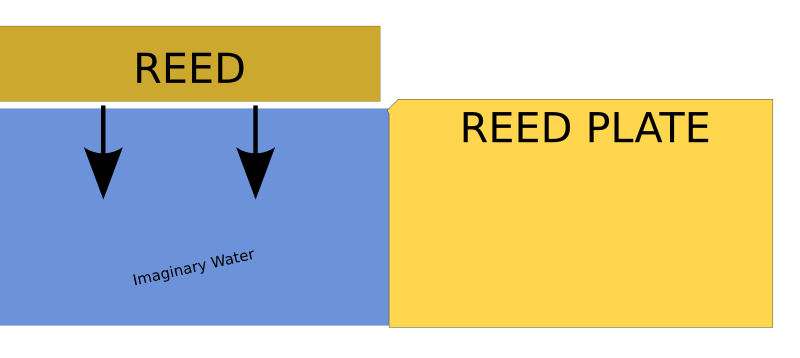
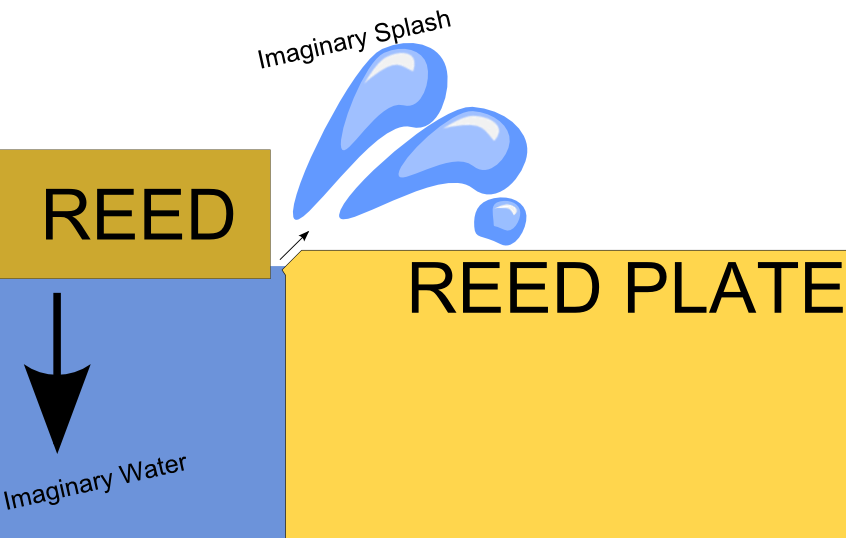
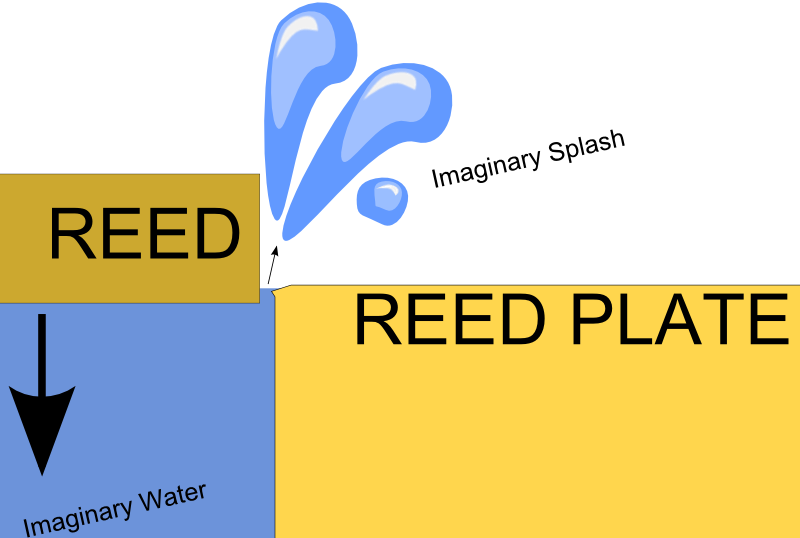
There are several forces acting upon the reed other than our breath. I choose to think of breath force in terms of air flow rather than just a pressure gradient. This allows me to find the best shape of the reed so that it catches the wind like a sail. It's also possible to harness the other forces in action at the same time much in the same way.

After a few iterations I settled on a revised theoretical model which encompasses both my old approach and my new approach. I can explain and predict everything I am observing. No more anomalies.

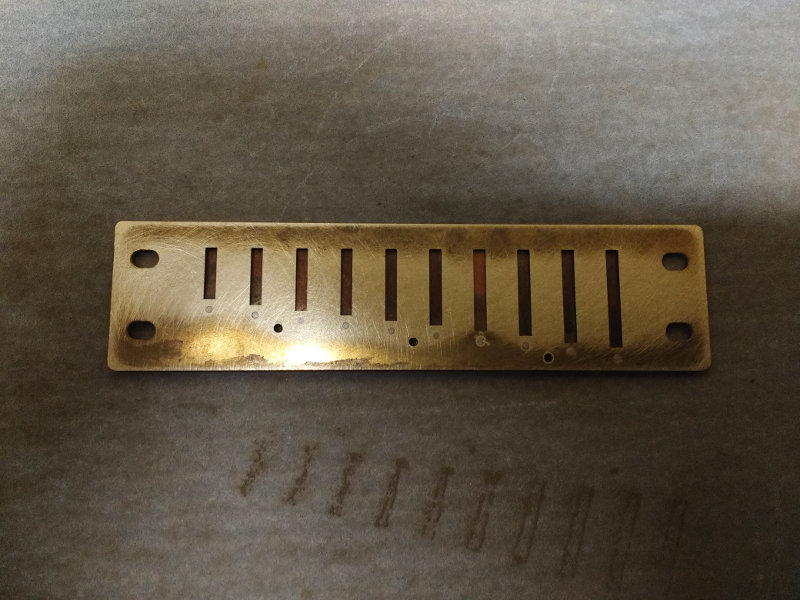
A harmonica isn't very complex - there are only 20 moving parts (the reeds). But the deeper you look for the things that make it play well, the more you find the things that can go wrong. There's a lot going on inside this simple technology.

I call my new approach sympathetic reed work™ because it's important to unite all the forces that are acting upon the reeds.

In my model of all the forces in action, the reed must play a supporting role.

What's exciting is that I can use this new approach to get excellent results with less time and effort than before I went down this path. I'm not done exploring; I think sympathetic reed work has a lot more potential to offer.

More to come...

The real cost of a custom harmonica

By Andrew | 10:19 AM EST, Fri November 18, 2016

Despite the higher initial cost, over five years the overall cost of ownership of a custom harmonica is significantly lower than the cost of stock, off-the-shelf harmonicas.

My custom harmonicas are remarkably responsive, loud and FUN to play. They are sold at a higher price that stock, off-the-shelf harmonicas, but they are much better instruments. Considering the hours spend on customizing each instrument, a custom harmonica is better value despite the higher price.

When you buy a custom harmonica from me, you can expect to have a well-playing instrument for years to come. This is because I offer service to your custom harmonica.

If you look a little beyond the initial purchase, a custom harmonica is usually cheaper to own that a stock instrument.

My service extends the life of the instrument. Reeds can be replaced, the tuning can be adjusted and the harp can maintain its high level of response and volume far beyond the lifespan of a stock harp.

Comparison: Purchase price:

Hohner Crossover* - $111
Semi custom Hohner Rocket - $179
Custom Hohner Marine Band Deluxe - $268
*http://wilsonmusic.ca/product-category/harmonica-dealers-toronto/hohner… (Shipping costs added)

Let's assume a harp lasts about a year before it becomes worn out. I believe a custom harp can last longer than a stock harp in most cases but to be fair, let's consider both harps equally.

To replace a stock harp, you will need to spend the purchase cost on a new harp. To service my custom harp, you will need to spend about $50 ($30 plus two way shipping)

Comparison: Over Five years:

Hohner Crossover* - $111 x 5 = $555
Semi custom Hohner Rocket - $179 + $200** = $379
Custom Hohner Marine Band Deluxe - $268 + $200** = $468
** Service costs with shipping charges added

My custom harmonicas are much better instruments than stock. Despite the higher initial cost, over five years the overall cost of ownership of a semi-custom or custom harmonica is significantly lower than the cost of stock, off-the-shelf harmonicas. My custom harmonicas offer much better value than stock instruments.

(video) Harmonica repair mistakes #7 - When do you stop?

By Andrew | 5:50 PM EDT, Mon October 31, 2016

A Facebook friend asked about Tuning-Embossing-Shaping. "Knowing when I'm getting tired and/or impatient and knowing when it's time to get up & walk away."

Would you like me to make a video about your "best" mistake? Contact me and let me know your ideas!

https://harp.andrewzajac.ca/

(video) Harmonica repair mistakes #6 - Wrong reed, wrong direction!

By Andrew | 5:49 PM EDT, Mon October 31, 2016

A Facebook friend asked about working late into the evening and tuning the wrong reed, or tuning it in the wrong direction - how do you avoid this?

Would you like me to make a video about your "best" mistake? Contact me and let me know your ideas!

https://harp.andrewzajac.ca/

(video) Harmonica repair mistakes! #5 - Heavy handed

By Andrew | 6:58 AM EDT, Mon October 24, 2016

If you feel like a bull in a China shop, here are some easy tricks to help you to work with a light touch.

Would you like me to make a video about your "best" mistake? Contact me and let me know your ideas!
https://harp.andrewzajac.ca/

(video) Correcting imperfections in just TWO TINES using the Comb Tool™

By Andrew | 10:17 PM EDT, Sun October 23, 2016

A Facebook friend posed a question about a wooden comb. Here's my suggestion.

This is a great job for the Comb Tool™.

Embossing tool improvement

By Andrew | 1:33 PM EDT, Tue October 04, 2016

I have improved my embossing tool to provide more flexibility (and safety) at the rivet end. With it, you can emboss with a wide range of angles all along the length of the slot.

Here is an illustration of what the different angles of embossing look like if you zoom in really close to a cross-section of the slot.

This is embossing at a 45 degree angle:

This is embossing with a smaller angle:

Why is the angle important?

I visualize each slot as a tiny swimming pool. In my model, when the reed hits the water it creates a splash and the angle of the embossed edge can change the direction of the splash.

Here is the reed just before it hits the imaginary water:

A sharp angle would make the water "splash" further away.

Here the angle of the embossed edge is a lot smaller. A smaller angle would make the water "splash" higher

Different angles can offer different results as far as tone and response. You can use different angles on different portions of the slot. I encourage you to discover what is the best pattern for you.

(video) Harmonica repair mistakes! #4 - Which reedplate plays the bend?

By Andrew | 7:57 PM EDT, Tue September 13, 2016

Did I just ruin my harmonica? In this series I want to cover the most common mistakes and turn them into learning opportunities.

Today I talk about making bends easier. What reed should you adjust to make bends easier?

Both reeds simultaneously participate in draw bends on holes 1-6 and blow bends on holes 7-10.

Would you like me to make a video about your "best" mistake? Contact me and let me know your ideas!

https://harp.andrewzajac.ca/

(video) Harmonica repair mistakes! #3 - Tuning by numbers

By Andrew | 10:49 AM EDT, Mon September 12, 2016

Did I just ruin my harmonica? In this series I want to cover the most common mistakes and turn them into learning opportunities.

Today I talk about trying to tune a harmonica using the numbers from a tuner.

Would you like me to make a video about your "best" mistake? Contact me and let me know your ideas!

https://harp.andrewzajac.ca/

(video) Harmonica repair mistakes! #2 - Embossing therapy

By Andrew | 10:46 AM EDT, Mon September 12, 2016

Did I just ruin my harmonica? In this series I want to cover the most common mistakes and turn them into learning opportunities.

Today I talk about the common misconception that embossing fixes problems like air leaks or makes the reeds play better.

Would you like me to make a video about your "best" mistake? Contact me and let me know your ideas!

https://harp.andrewzajac.ca/

(video) Harmonica repair mistakes! #1 - We got a man down!

By Andrew | 10:45 AM EDT, Mon September 12, 2016

Did I just ruin my harmonica? In this series I want to cover the most common mistakes and turn them into learning opportunities.

Today I talk about bending a reed too far.

Would you like me to make a video about your "best" mistake? Contact me and let me know your ideas!

https://harp.andrewzajac.ca/

(Checklist) Reed replacement

By Andrew | 4:40 PM EDT, Tue August 09, 2016

This is part of a series of checklists I am making available to you.

Click the "Printer-friendly version" link at the bottom of the page and feel free to print out as many copies as you like!
----------

Reed replacement checklist
version 2016/07/24

Items needed
___ Hammer
___ Reed removal pin
___ Reed removal spine
___ Brick or anvil
___ M1.4 tap
___ M1.4 screws
___ Reed wrench
___ Flush cut pliers
___ Drill press or Rotary tool with reamer bit

Remove bad reed
___ Identify bad reed
___ Place correct rivet head into reed removal spine hole (reed tip points away from spine)
___ Punch out rivet
___ Flip reed plate around and place on flat part of reed removal spine
___ Flatten hole using flattening pin
___ Tap hole using M1.4 tap. De-burr as needed

Prepare new reed
___ Obtain new reed
___ Enlarge rivet hole using drill press (1/16th inch bit) or rotary tool with reamer
___ De-burr as needed
___ Flatten rivet pad using flattening tool and flat part of reed removal spine

Install new reed
___ Position new reed into slot standing up and pinch it with your fingers
___ Insert M1.4 screw and tighten all the way
___ Loosen the screw very slightly
___ Look at a light source through the slot and align the reed
___ If the reed doesn't align, remove the screw, enlarge the hole in the rivet pad and repeat all the steps to prepare the reed
___ Pinch the base of the reed very tightly to hold the reed in place and tighten the screw
___ Re-confirm reed position and alignment
___ Snip off back of screw
___ Re-confirm tightening of screw
___ Re-align reed
___ Flat sand draw reed plate or sand down tip of screw in blow plate

Fix reed shape and tuning
___ Correct reed curve using pressure and counterpressure
___ Tune reed

(Checklist) Convert Marine Band 1896 to screws

By Andrew | 4:34 PM EDT, Tue August 09, 2016

This is part of a series of checklists I am making available to you.

----------

Convert Marine Band 1896 to screws checklist
version 2016-12-13

Items needed
___ Thin Paring knife
___ Drill press with 1/16 inch and 3/32 inch bits
___ Pliers (flush cut or needle nose)
___ M2 Tap and tap holder
___ M2 Screws and nuts
___ Clean sheet of 220 grit sandpaper taped to a flat surface
___ F tool
___ French Tuner
___ Wet towel to moisten fingers
___ Replacement comb
___ Flat punch (optional)

Remove cover plates
___ Pry off covers using a paring knife
___ Gently remove nails from covers using pliers
___ Drill front cover plate holes with 3/32 in bit
___ Flatten back nail holes for aesthetic purposes (optional)

Remove reed plates
___ Insert paring knife between back of blow reed plate and comb
___ Advance the knife without prying up so as to lift up all three middle nails (only the three middle nails)
___ Remove nails using pliers
___ Insert knife between back of draw plate and comb
___ Advance the knife without prying up so as to lift up all three nails (only the three middle nails)
___ Remove nails using pliers
___ Place harmonica top(blow plate)-side-down onto drill-press surface
___ Drill through-and-through the three draw plate nail holes using a 1/16 inch bit
___ Remove the remaining nails on the sides of the reed plate using the paring knife and pliers

Prepare reed plates
___ Tap three 1/16 inch holes in DRAW plate with M2 tap
___ Flatsand the draw reed plate using 220 grit sandpaper and a flat surface
___ Enlarge the holes in the BLOW plate using 3/32 inch drill bit
___ De-burr the holes of the BLOW plate
___ Check and correct flatness of the BLOW plate using the French Tuner and the F tool.

Assemble the harmonica using screws
___ Gather both reed plates, both cover plates, five M2 10mm screws, two M2 nuts and a flat comb
___ Hold the comb with the long slots to your left
___ Pick up the reed plate that has all the rivet pads lined up at the front. This is the blow plate
___ Put the blow plate on the comb with the reeds on the inside
___ Put the draw plate on the comb with the reeds on the outside
___ Line up the plates and the comb so that you can insert the middle screw
___ Tighten the screw almost all the way. Keep it loose enough so that you can wiggle the plates and comb to align the other screws
___ Insert the two other reed plate screws
___ Align the reed plates and comb to your liking (press the tine-side down onto a clean flat surface to line everything up)
___ Tighten the screws using finger pressure

Install the cover plates
___ Place the top cover plate (with the numbers) into the groove on the top of the blow plate
___ Turn the harmonica over and place the bottom plate into the groove on the draw plate.
___ Line up the cover plate holes and insert a screw
___ Wet the tip of your finger and pick up an M2 nut
___ Place the nut onto the tip of the screw and tighten almost all the way
___ Align the cover plate holes on the other side and insert a screw and nut
___ Tighten both screws using finger pressure.

Checklists

By Andrew | 4:32 PM EDT, Tue August 09, 2016

I use checklists. They help me do my work better and faster.

"A checklist is a type of informational job aid used to reduce failure by compensating for potential limits of human memory and attention. It helps to ensure consistency and completeness in carrying out a task." (Wikipedia)

I don't have a checklist for every task I do, I tend to make them up when I realize I keep repeating the same mistake. I also tend to revise some checklists quite often, incorporating new and better ways of doing things - just because I use a checklist doesn't mean I stop thinking. In fact, a checklist helps me come up with new ideas and incorporate them in my practice very easily.

There are two general types of checklists. The first is just a list. For example, you make a list of things you need to pack before going on a trip. Before you leave, you go through the list to make sure you haven't forgotten anything. This is generally called "Do - Confirm"

The second type is generally called "Read - Do" and it breaks down the steps of a task. It's meant to be read in sequence and each step of the task is performed before you move on to the next step.

I will be publishing some checklists in the coming weeks right here on my website. I hope you find them useful!

I won't publish every checklist I use. But I may make up some new ones to help those who prefer having a written guide when they try out a new task for the first time.

F Tool™ used on the draw plate

By Andrew | 9:22 AM EDT, Tue July 19, 2016

Flat sanding the draw reed plate is one of the easiest things you can do to improve a harmonica. It almost always works.

BUT... There are exceptions to the rule and harps from any manufacturer can fall victim. I came across two examples of this in one week.

If you begin to flat sand a draw reed plate and see this, STOP! Flat sanding won't fix this. The curve in the plate is too big. The F tool™ can handle this!

The curve is so deep that you cannot sand this down to make it right. Here is a view of the plate along with the French Tuner™ used as a reference. Can you see how much space there is in between the French Tuner and the reed plate? An air leak like this makes that harp feel really stiff!

I straightened the plate using the F tool in the usual manner.

Now, I may have overshot the mark and pushed the middle of the plate back too far. How can you tell? You can check with the French Tuner or you can use the flatsanding process to save some time.

Since the middle of the plate is nice and shiny if I go back and flatsand I may not see any problem. Everything will look shiny!

So I drew some markings across the reed plate. This will reveal any spots where I may have over done it.

Sure enough, I over did it as is shown by the red spot that remains after sanding.

I corrected that using gentle pressure with the F tool. I drew more red lines once again to be sure I didn't overshoot the mark once again.

After a little flat sanding, every trace of the red lines are gone and that means the reed plate is now flat.

This made a very big difference in how well this harmonica plays!

Pagination
  • First page « First
  • Previous page ‹ Previous
  • …
  • Page 5
  • Page 6
  • Page 7
  • Page 8
  • Current page 9
  • Page 10
  • Page 11
  • Page 12
  • Page 13
  • …
  • Next page Next ›
  • Last page Last »
Subscribe to Drupal blog posts

User account menu

  • Cart
  • Log in

All blog posts

No content available.
Pagination
  • First page « First
  • Previous page ‹ Previous
  • Page 1
  • Page 2
  • Page 3
  • Page 4
  • Current page 5

Custom diatonic harmonicas, Hohner Affiliated Customizer.
I customize Hohner Marine Band, Rocket, and Special 20 harmonicas.
Andrew Zajac, Kingston Ontario, Canada.
I use a continuous quality improvement process. I use regular evaluation and incremental steps to strive for constant improvement.
Website, text, photos, videos, download documents, designs and products by Andrew Zajac are licensed under a Creative Commons Attribution-ShareAlike 4.0 International License.
Terms of use

Copyright © 2026 Andrew Zajac - All rights reserved